

ODOO'S FUNCTION
In previous Odoo versions, internal newsletters were automatically delivered to employees via their private email. However, since the upgrade to Odoo 17, this behavior no longer works by default. HR or communication teams now need to manually maintain mailing lists.
CLUEDOO'S FUNCTION
Cluedoo streamlines internal communications by integrating your employee directory with Odoo's Mass Mailing features, introducing:
1️⃣ Native Employee Recipient Source: Send mass mailings directly to employees, using their email address from the Employee app.
2️⃣ Automated Unsubscribe System: An unsubscribe link is automatically included in every email, allowing employees to opt out and be instantly blacklisted.
3️⃣ Effortless Blacklist Management: View opt-out status and remove an employee from the blacklist with a simple toggle on their employee record.
Employee Newsletter 1. You can specify which email address you would like to receive the newsletter on the employee form, in the Email Newsletter field By default, it will be Private Email Private Email is the one you set under the Private Information tab | 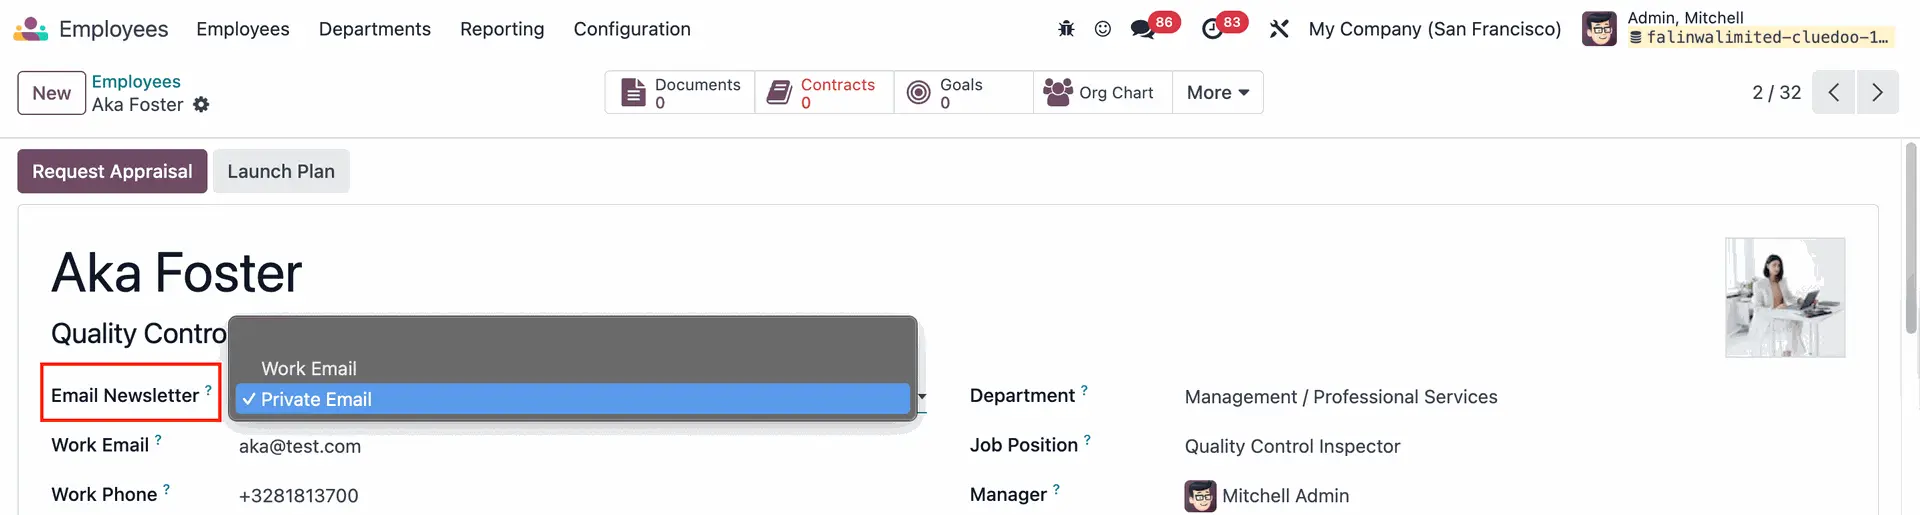 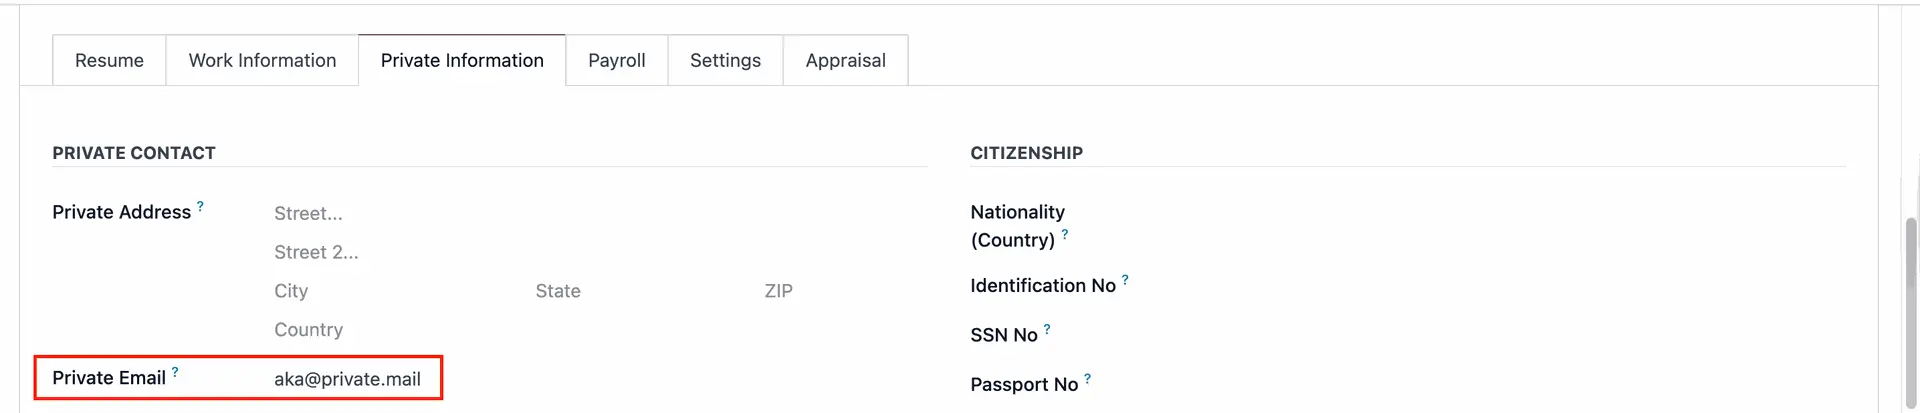 |
Update from v19 Private Email is the one you set under the Personal tab | 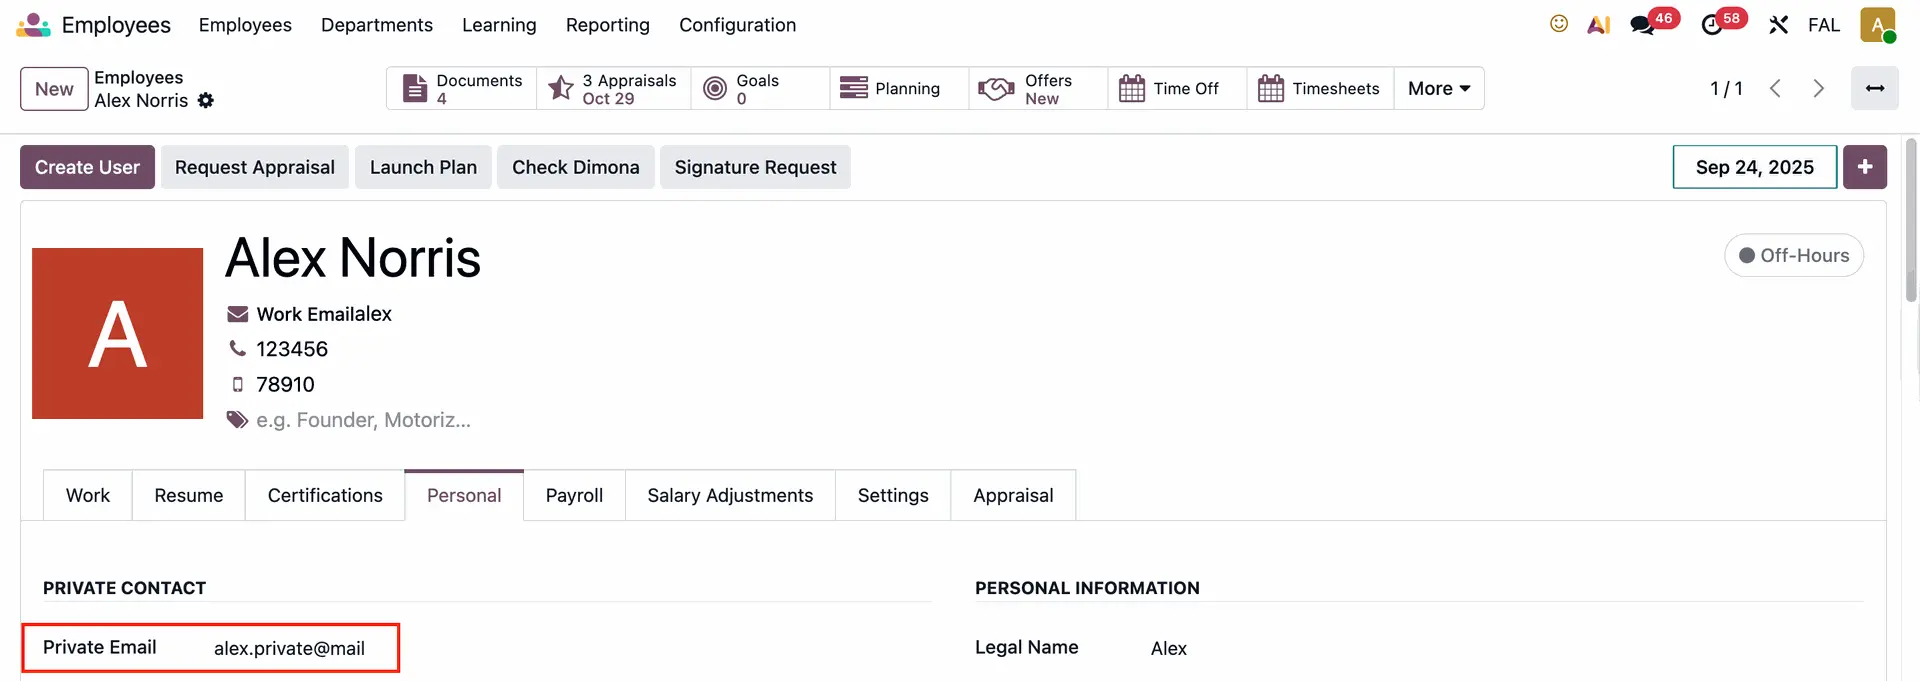 |
2. Go to Email Marketing > Mailings > Create new email > You will see the Employee option on the recipients list > Create a mailing list for the employees > Send | 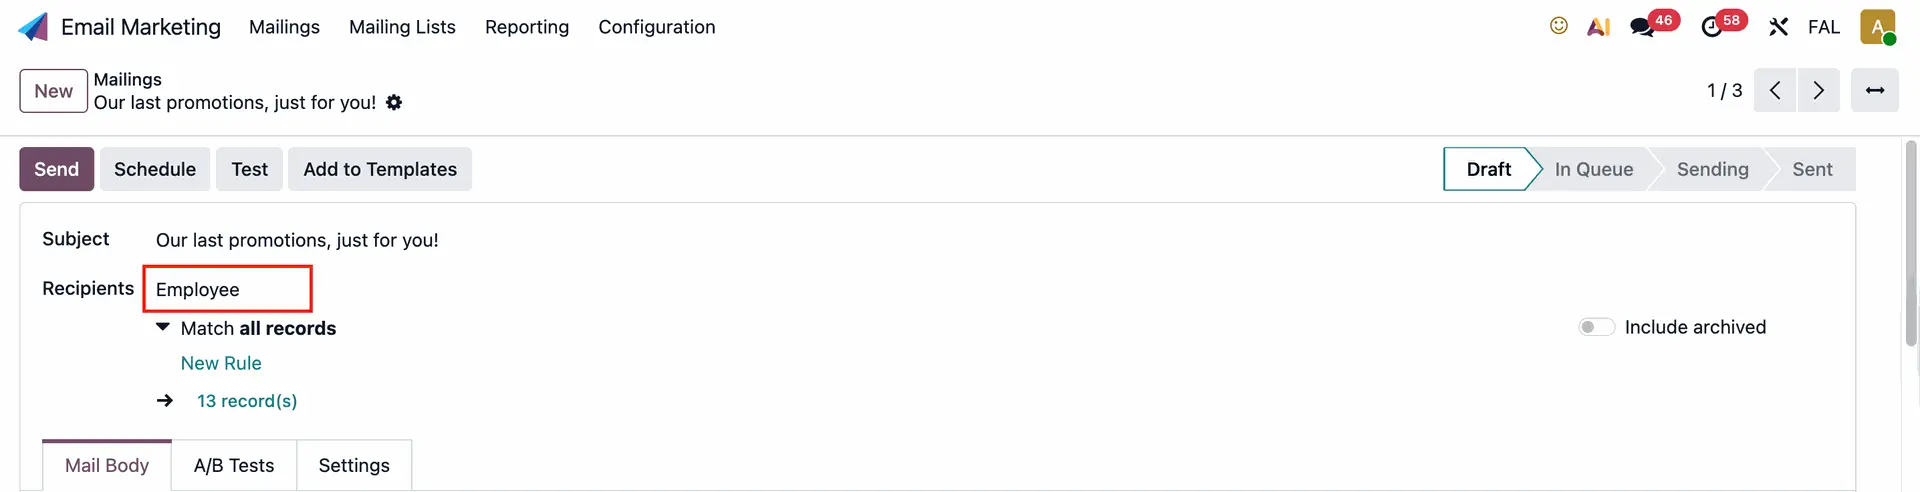 |
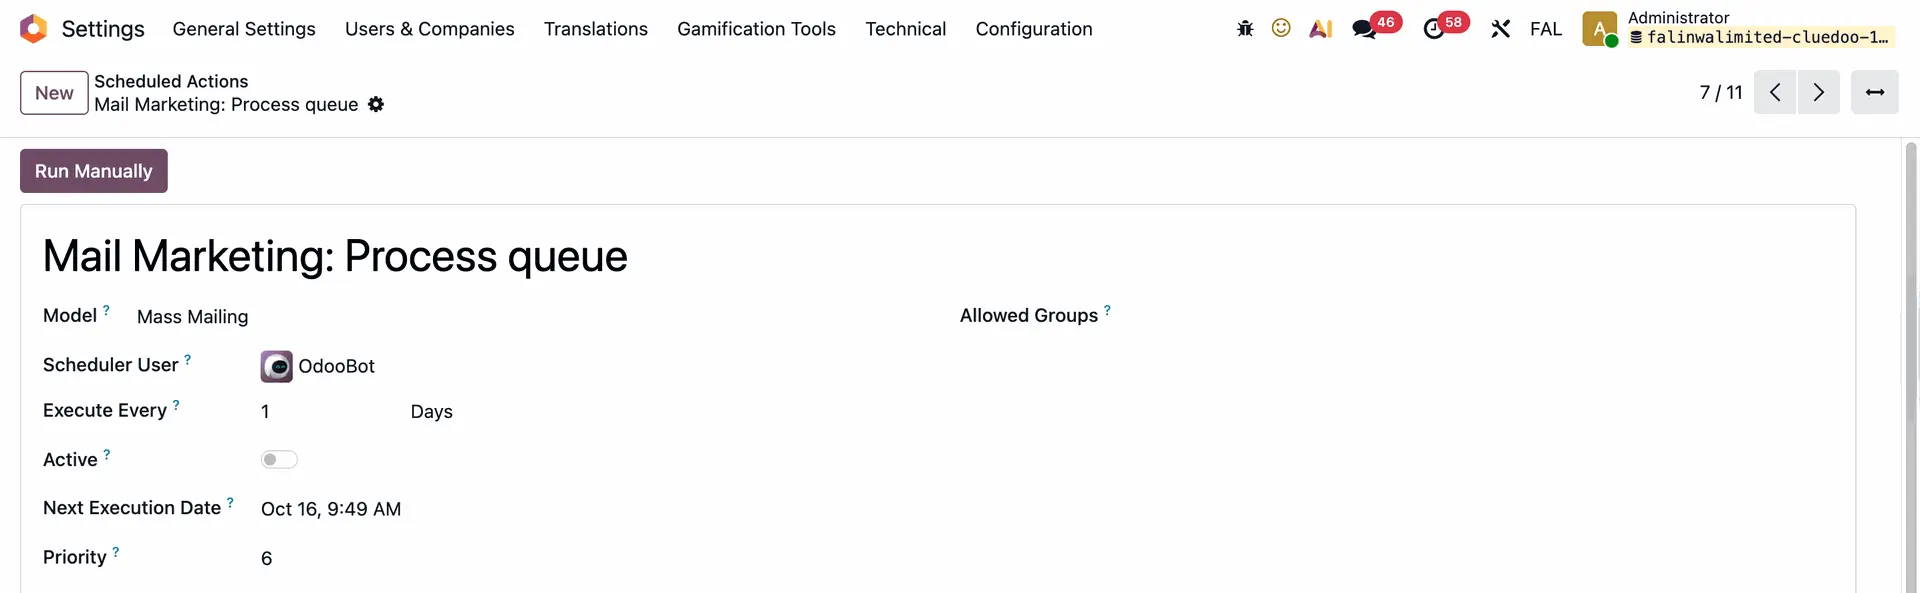
Note: If your newsletter isn't sent out as your schedule:
|  |
3. You can unsubscribe by clicking the button; it will redirect to the unsubscribe link | 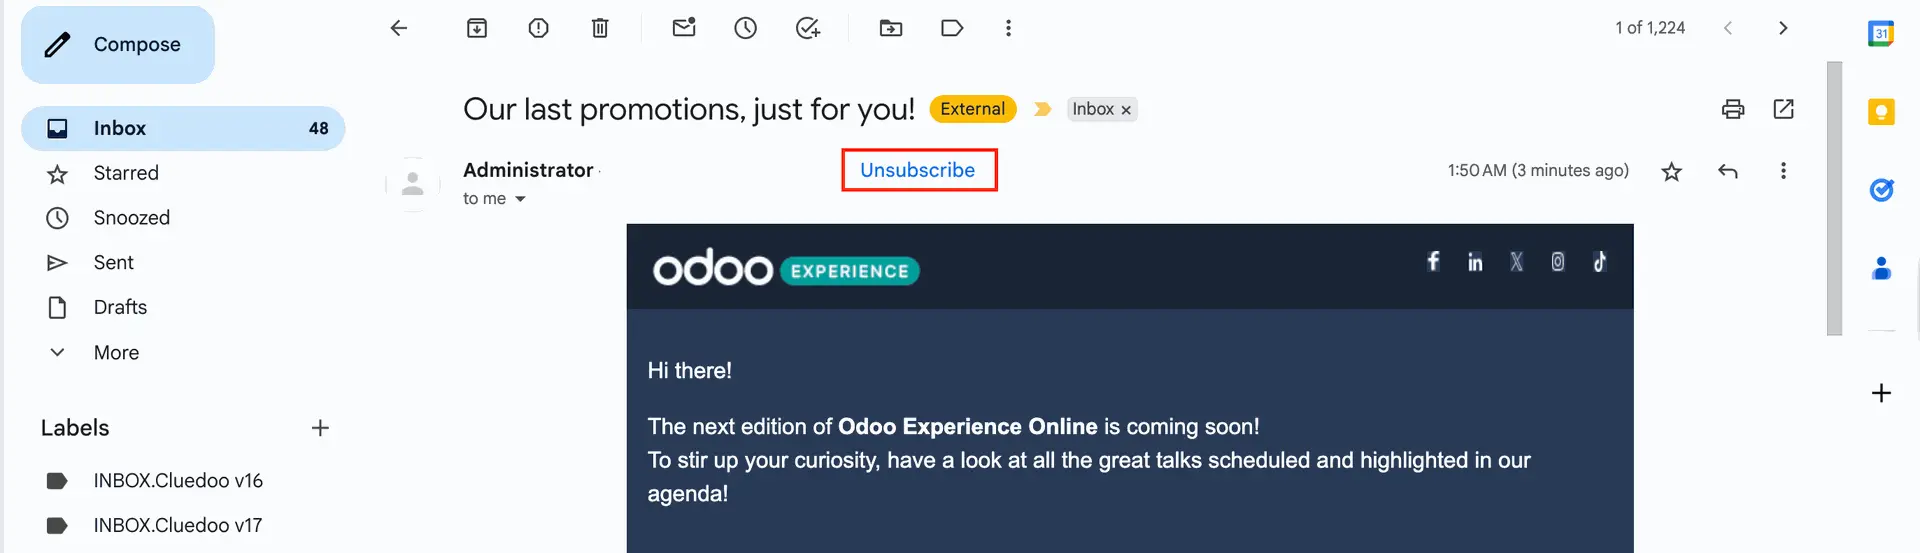 |
After you unsubscribe, your email will be added to the Blacklisted Email Addresses > Any new emails will no longer be sent to your email |  |
4. To check the log of email, you can go to Settings > Technical > Mass Mailing > Mailing Traces menu |  |
Note: If you send emails by clicking the Test button, it will send emails to those in the blacklist as well |  |
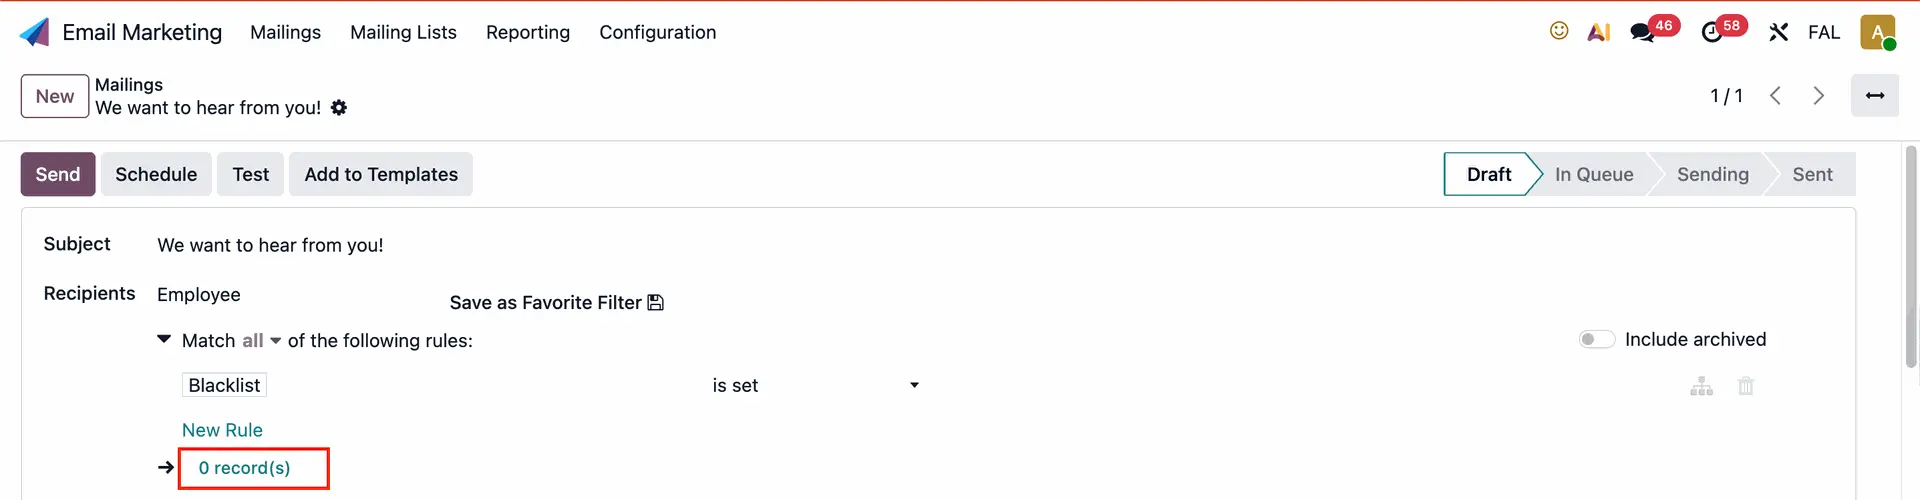
Blacklist for Employee diffusion list1. Go to Email Marketing > Mailings > Create new email > Choose Employee option on the recipients list > Create New Rule > Now, Blacklist is set Instead of manually checking the blacklist without knowing who our employees are (in ODS), this feature helps you to identify them directly. | 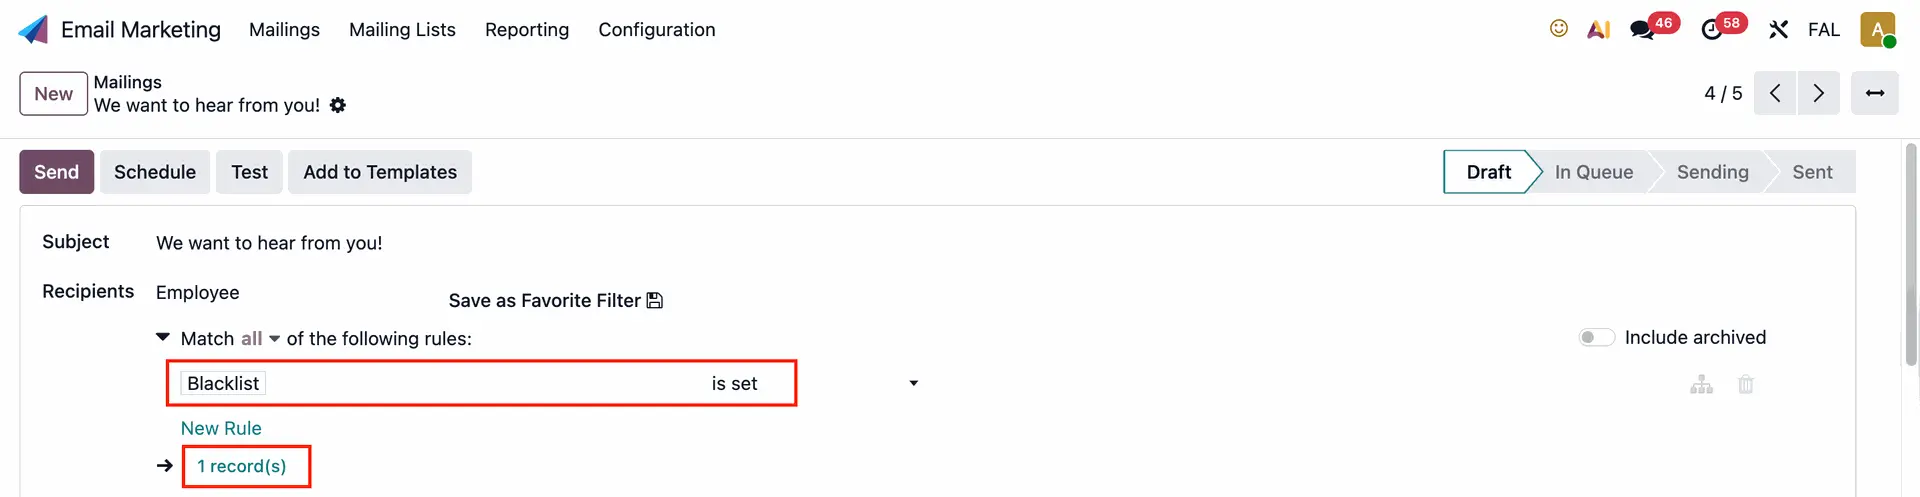 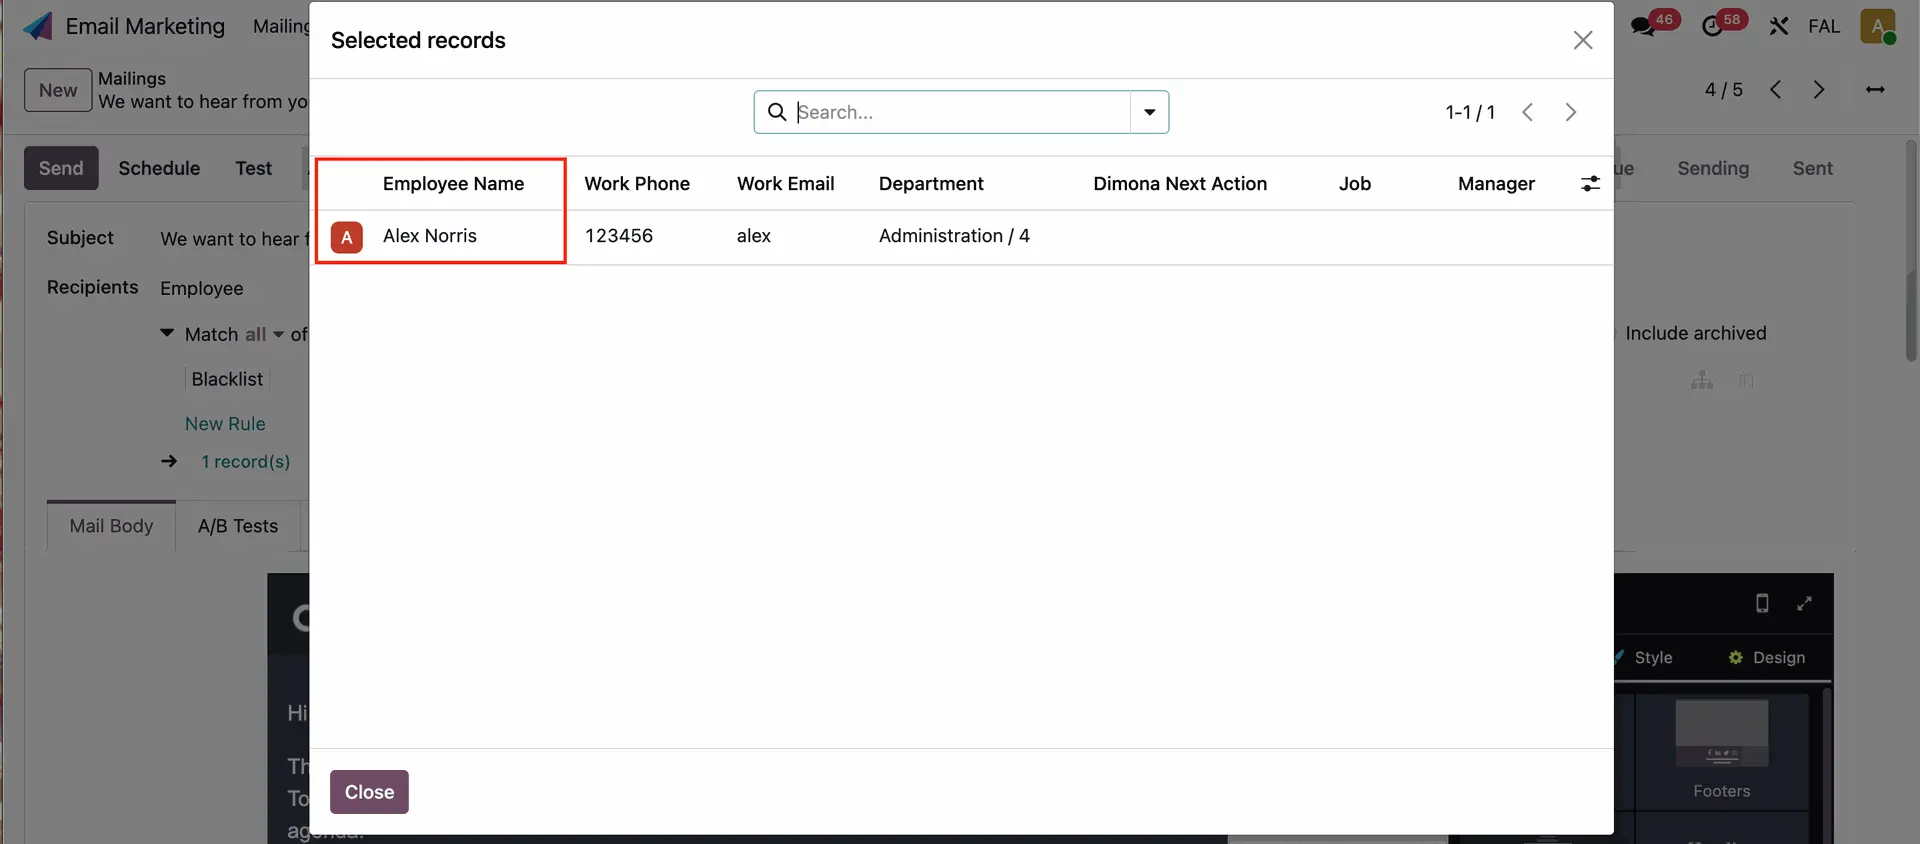 |
2. Go to Employees > Choose or create a new employee > You can now verify whether this employee is on the blacklist. To remove an employee from the blacklist, click the button beside their email, and the employee will be removed from the blacklist. | 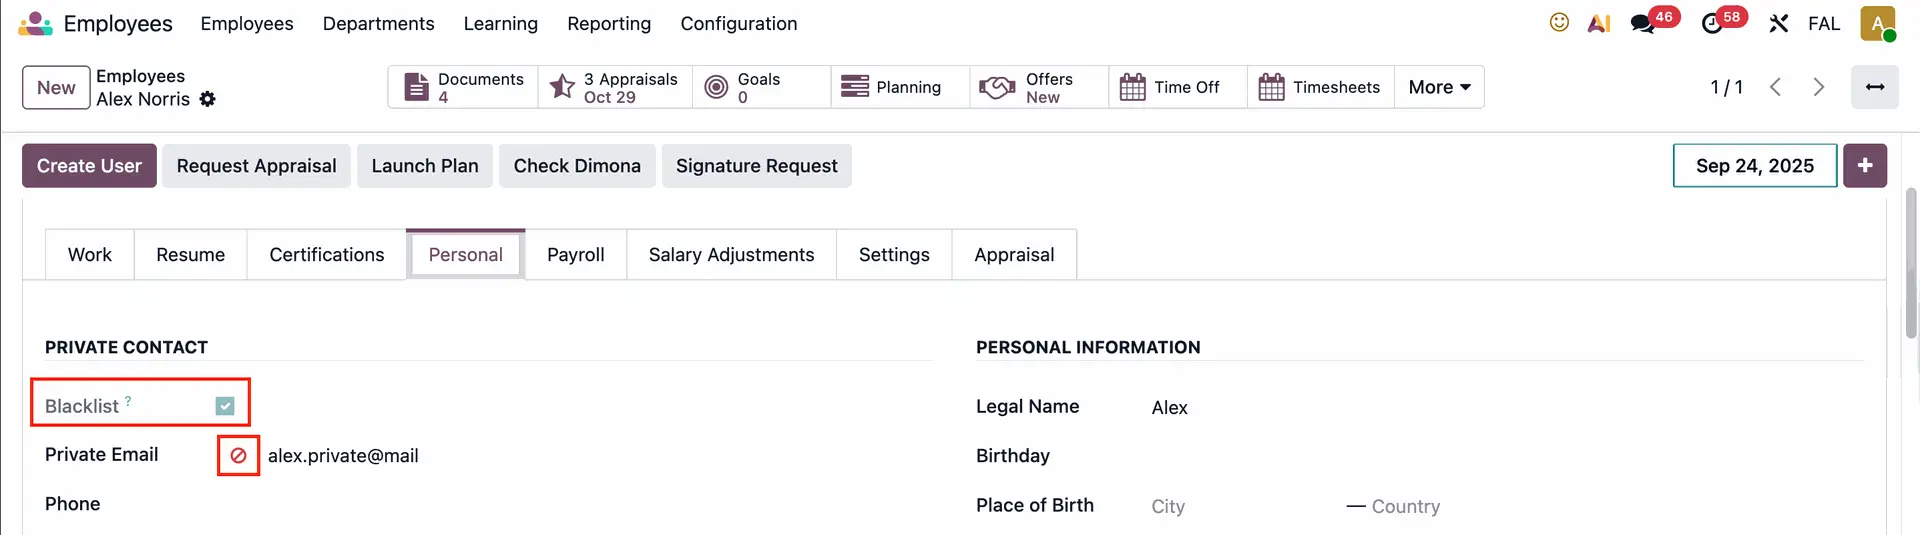 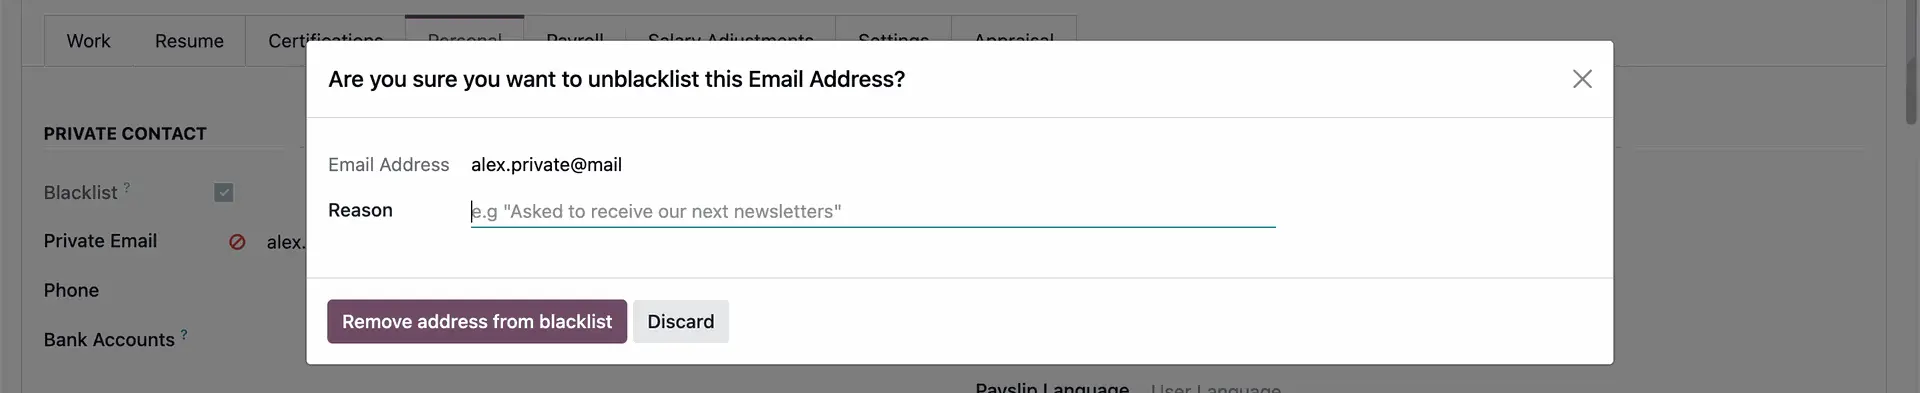 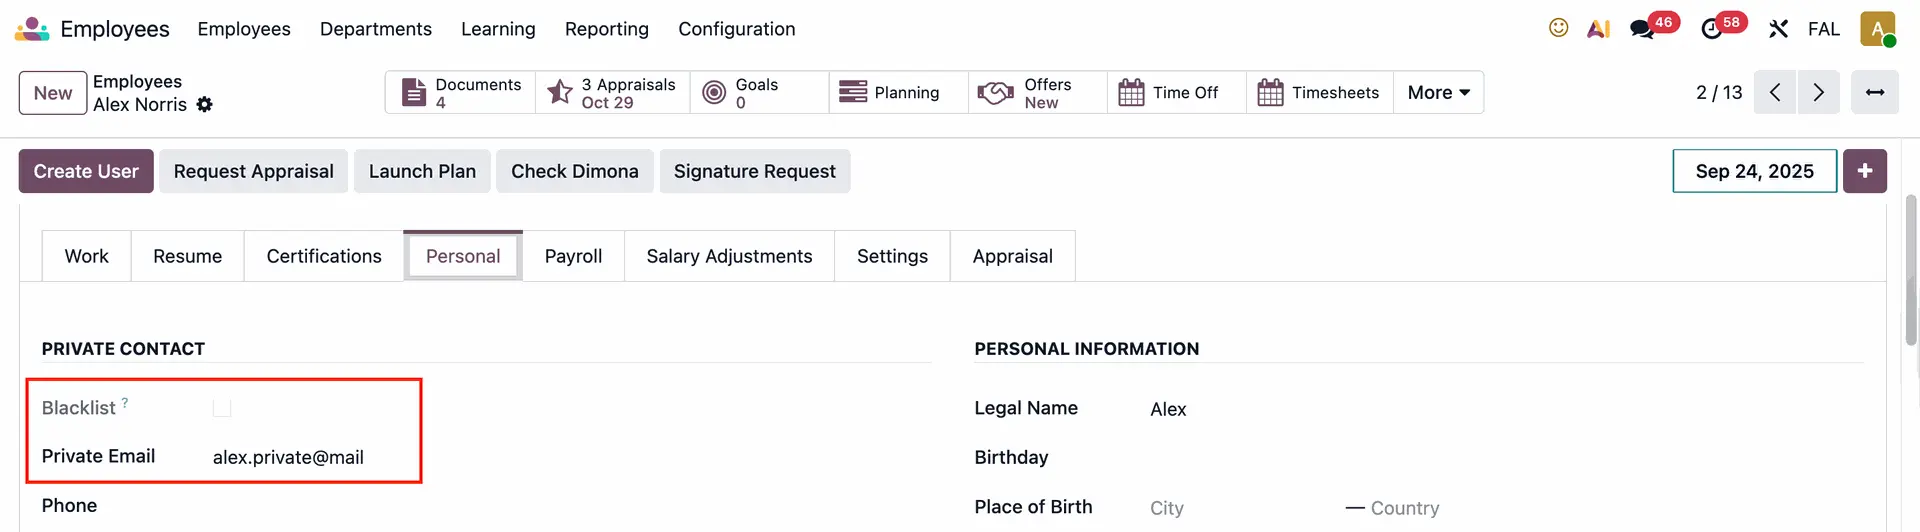 |
They will be removed from the Blacklisted Email Addresses and from the mailing blacklist as well |
|