ODOO'S FUNCTION
In Odoo, identifying required fields can be difficult because they rely on subtle visual cues, like slight bolding. Conditionally mandatory fields are even more problematic, as they remain completely invisible until triggered by an action. In a fast-paced business context, such as qualifying a lead, it is critical for users to know exactly which data fields will be required to successfully advance to the next stage without guesswork.
CLUEDOO'S FUNCTION
To solve this visibility issue, CLuedoo introduces a feature that allows users to apply custom CSS classes to any field directly from the interface, completely bypassing the need for Odoo Studio. Whether you need to highlight a conditionally required field or add warning text, the tool makes it simple. Behind the scenes, the system handles the technical heavy lifting by automatically generating and updating a single inherited view per model to seamlessly store your customizations.
CONFIGURATION | |
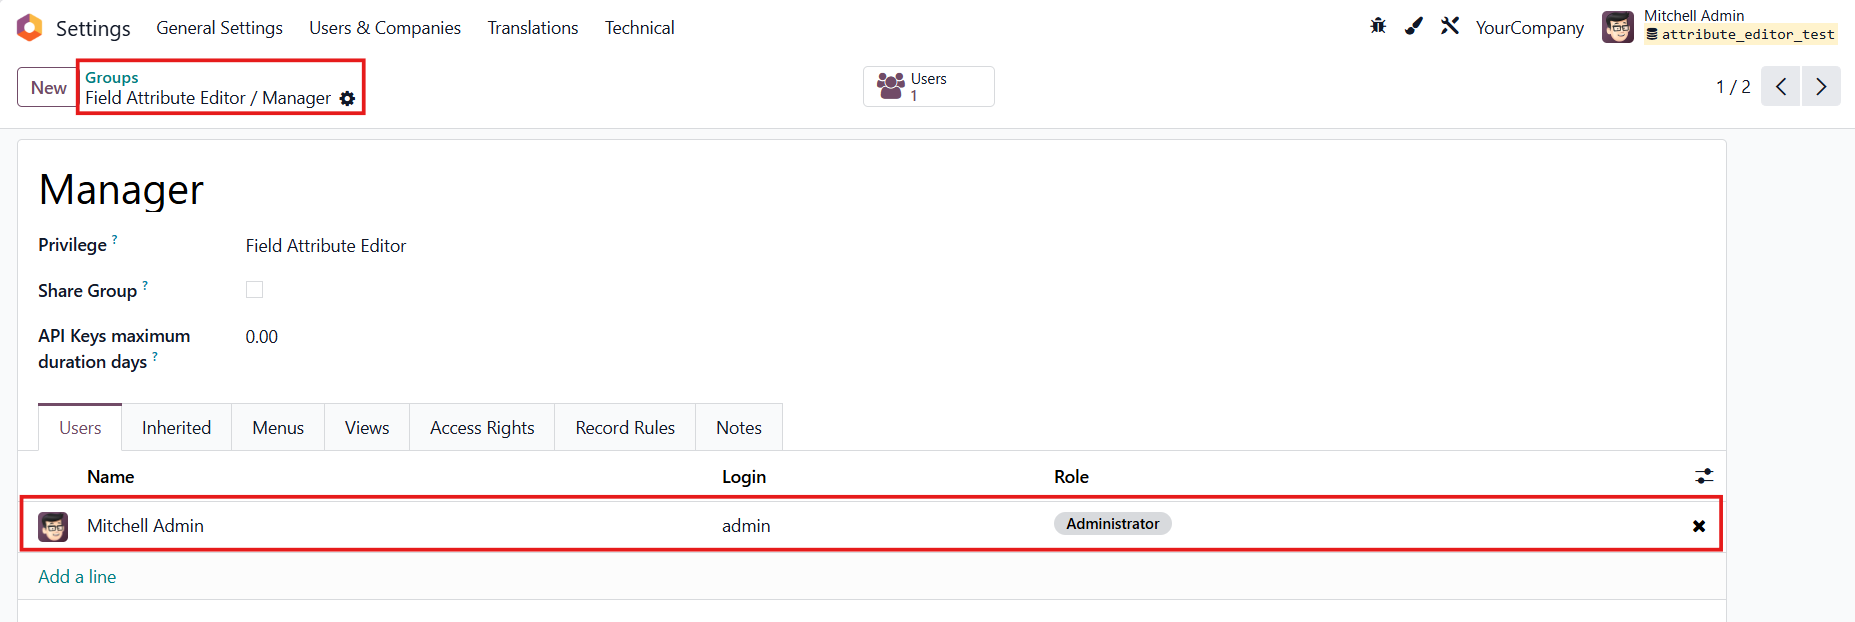
Go to Settings > Users & Companies > Groups and search for Field Attribute Editor / Manager > Add the user(s) in |
|
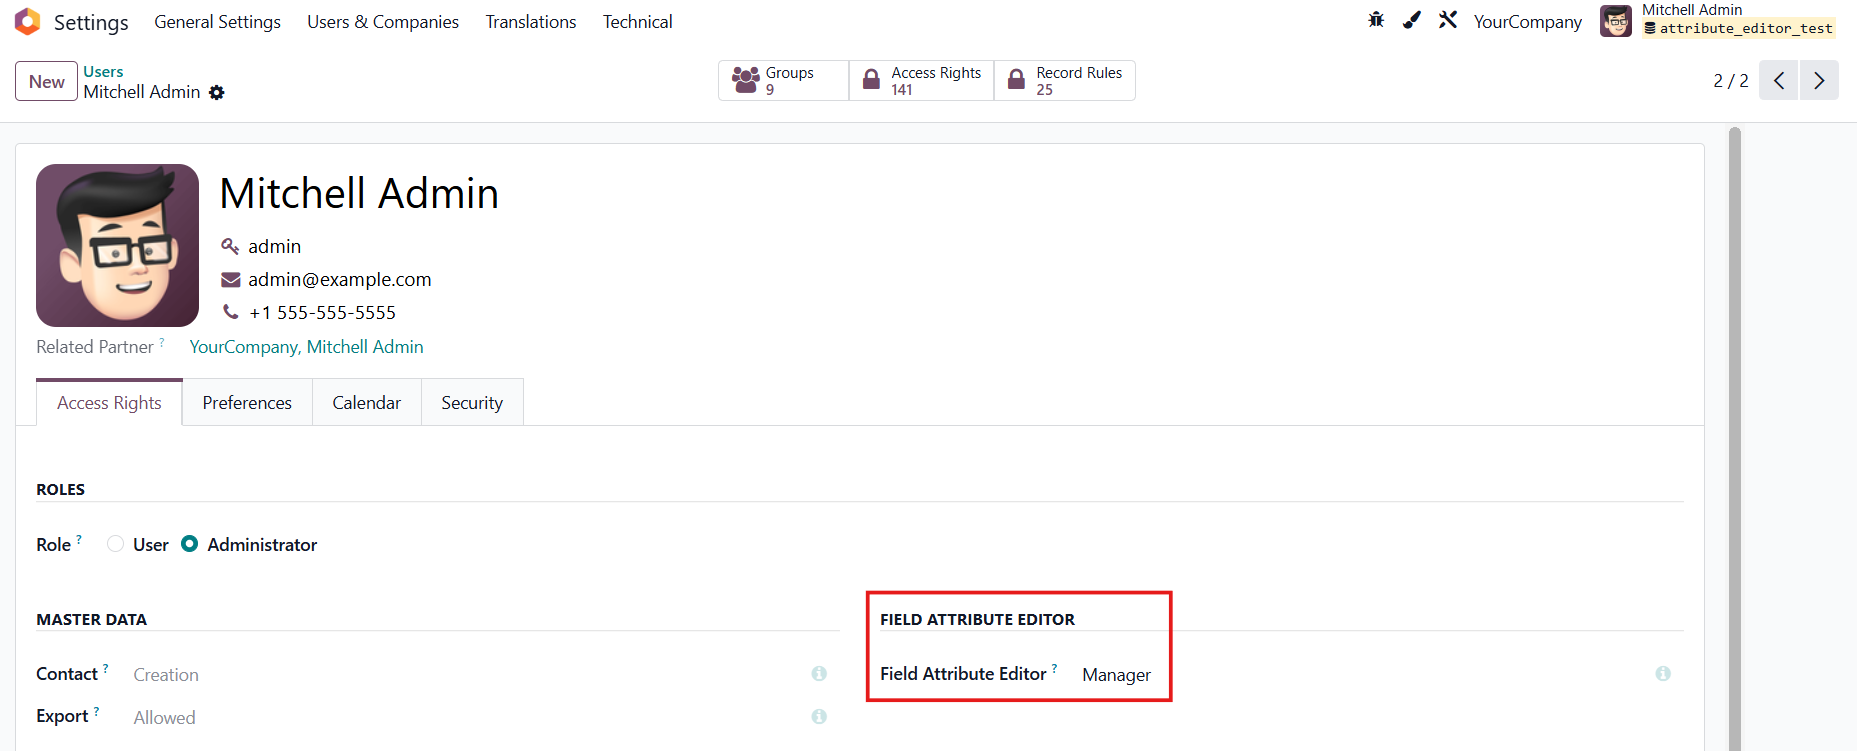
Alternatively, go to Settings > Users & Companies > Select a user and grant them Manager access rights in the Field Attribute Editor. |
|
On the Odoo homescreen, you will see a paintbrush icon in the top-right corner. |
|
USAGE | |
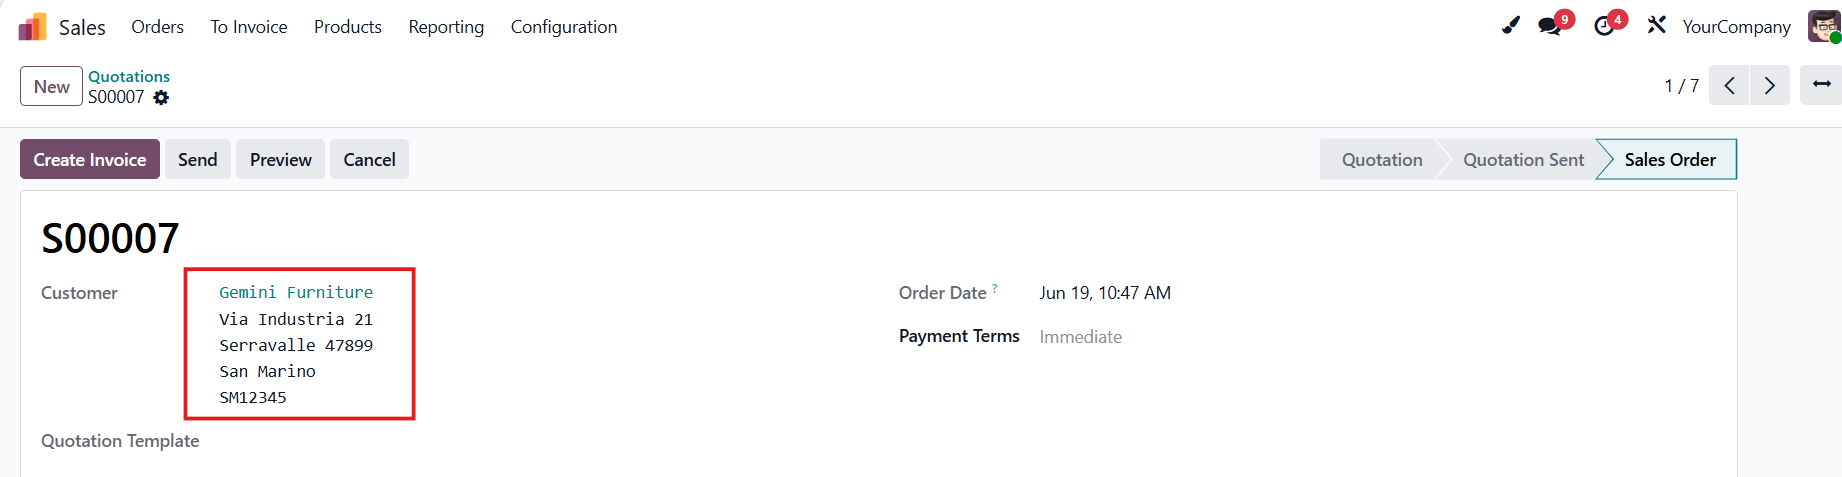
1. Open a record in any model > Click on the paintbrush icon e.g., Sales Order | 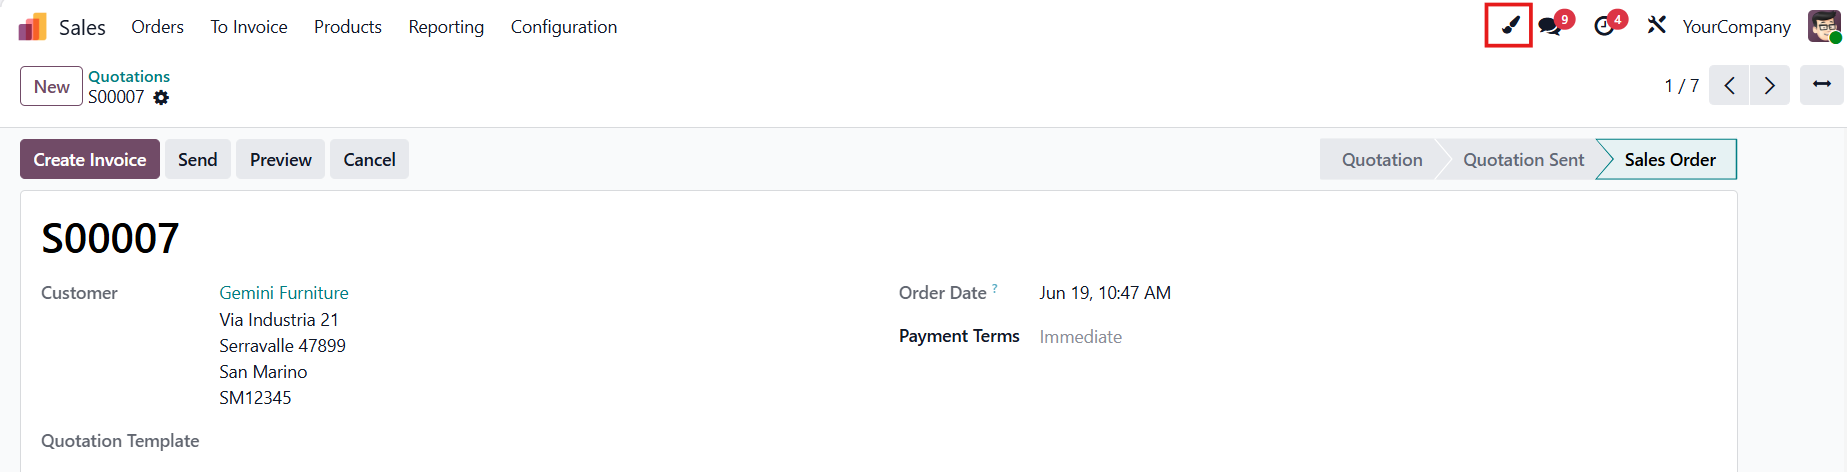 |
2. From here, you can select any field in the form to assign its class. | 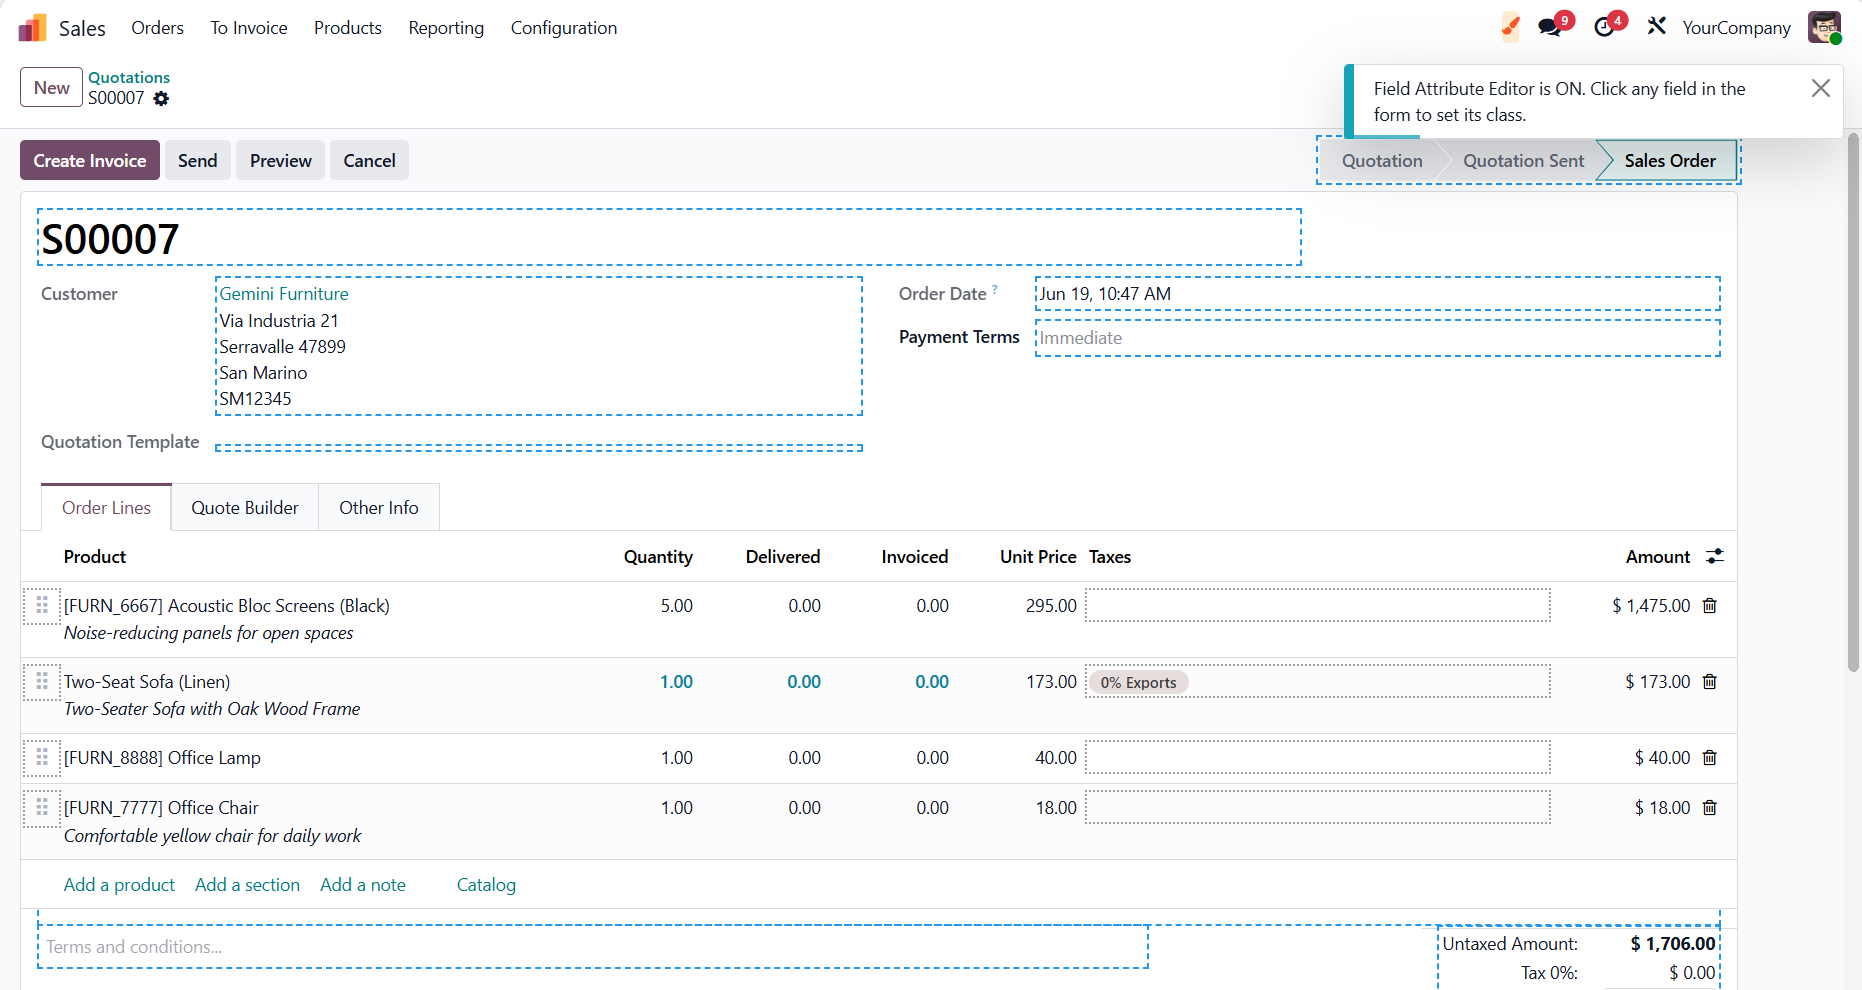 |
e.g., Customer |  |
Set the class > Apply e.g., font-monospace You can get the list of classes from this link: Documentation and examples for common text utilities to control alignment, wrapping, weight, and more. | 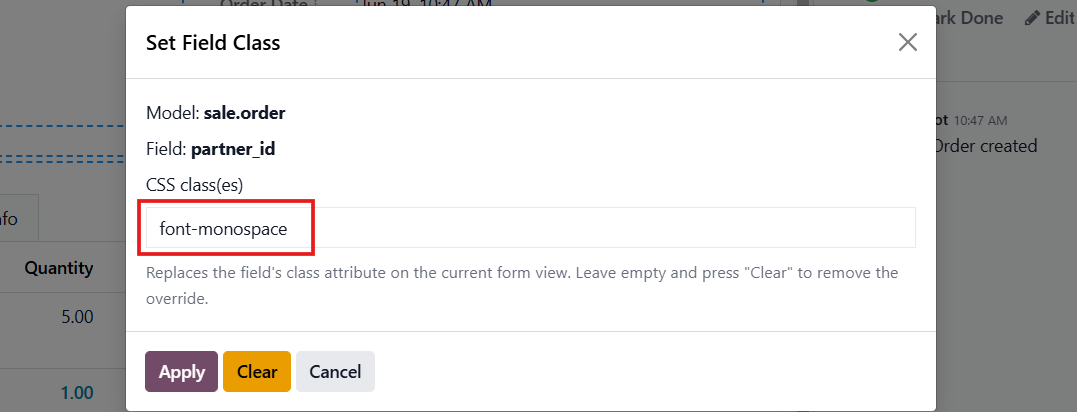 |
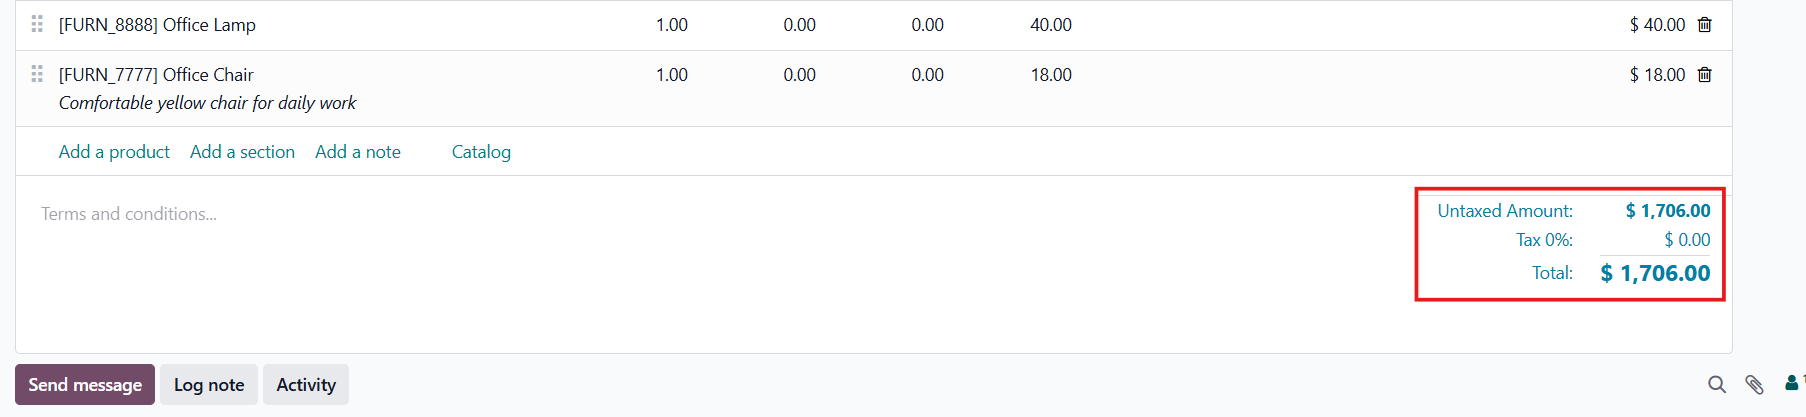
Result: Changes take effect immediately, and the page will refresh. |
|
Another example. e.g., text-info |
|
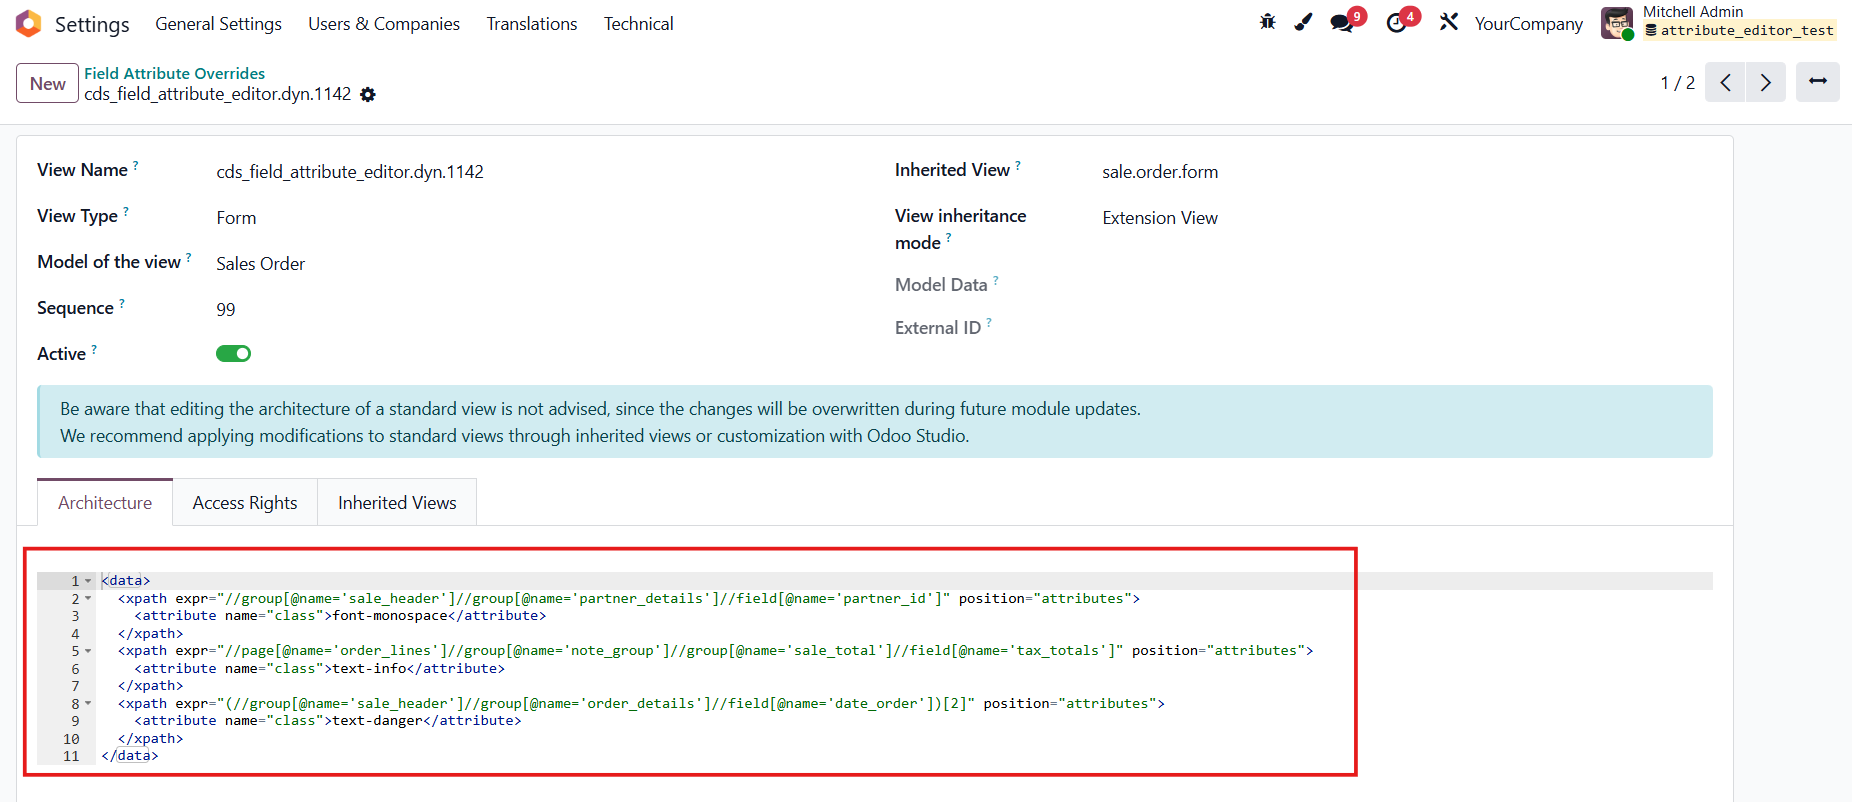
Head to Settings > Technical > Field Attribute Editor > Override Views |
|
The system automatically creates one inherited view per model to store your customizations. If you modify multiple fields within the same model, the system will simply update the existing XML code within the Architecture tab rather than creating a new view. |
|